Paolo Sammicheli’s Blog

Sex, Ubuntu and Rock and Roll!

Archive for the ‘Android’ Category

G1 USB Tethering with Ubuntu

Posted by Paolo Sammicheli on August 10, 2009

Since the first day I got my G1 I installed the useful WiFi Tether. It’s very useful and it allow to be quickly in the net from any operative system. The bad side is that it drain quickly the battery charge and the phone start to be hot after few minutes.

Today I found a nice program which allow Tethering with USB cable. It don’t need rooted phones, and the phone doesn’t warm up during tethering. It’s called azilink and like WiFi Tether is released under GPL License.

Following few steps to quickly share the Internet connection with your Ubuntu.

  • You need an installed and working Android Developer Toolkit (1.1 or 1.5, I tested it with 1.5)
    • connect your phone and try “adb devices” you should find your device listed, otherwise check the installation.
  • Install azlink‘s apk  with adb
    • adb install azilink-2.0.2.apk
  • Install openVPN
    • sudo apt-get install openvpn
  • Forward port with adb
    • adb forward tcp:41927 tcp:41927
  • Start AzLink in your phone and check “Service active” option to activate it.
  • Start openvpn with provided option file
    • sudo openvpn –config azilink.ovpn
  • Add manually dns server 192.168.56.1 to resolv.conf
    • sudo vi /etc/resolv.conf # or with your favorite text editor, add “nameserver 192.168.56.1”

That’s all, Enjoy it.

Update: If you want a nice script to make easier VPN on and off take a look here
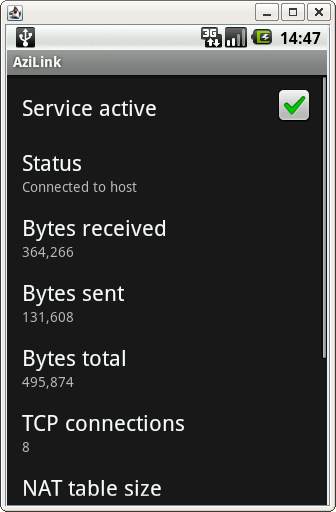
AzLink main page
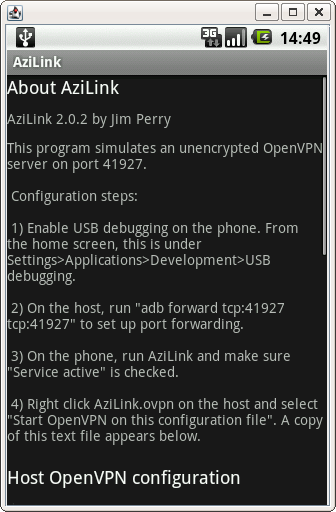
AzLink main page

AzLink About

AzLink About

Posted in Android, Free Software, Ubuntu | 20 Comments »

PyCon Tre

Posted by Paolo Sammicheli on May 11, 2009

Last weekend I attended PyCon 3, in Florence, with Milo. All talks were really interesting and it has been really nice to hear again Guido Van Rossum live.

I also enjoyed the Talk of the great Alex Martelli who makes me so proud of being Italian.

Sunday I made a Lightning Talk about my recent experiments with Jaunty on Android (1) (2).

But the best pleasure was to meet again old friends after so many years: Christian Surchi, Claudio Cicali and Carlo Miron.

Here you can see all the photos.

This great weekend i’s over but I’m already looking forward to the next weekend: me and Dario Cavedon will meet the students of Pontedera’s High Schools, introducing them to Free Software and Ubuntu. This will be the first pilot scheme for the Ubuntu @ School project of the Italian LoCo Team. The conference will be held at the prestigious Piaggio Conference Hall inside the Piaggio Museum (anybody out there don’t know what a Vespa is?) and I’m really excited about it.

Stay Tuned 😉

Posted in Android, Event, Ubuntu, Ubuntu-it | 2 Comments »

Jaunty + LXDE on Android

Posted by Paolo Sammicheli on May 4, 2009

Today I continued my hacking with Ubuntu chrooted on Android. I followed this guide based on Debian and I installed LXDE over the Ubuntu Minimal installation I prepared yesterday. All it’s pretty easy to do:

  • edit ./startubuntu script and add “export USER=root”.
  • Start ubuntu system with ./startubuntu script
  • Add universe and multiverse repositories to /etc/apt/source.list (if you downloaded my image you have just main)
  • apt-get install tightvncserver
  • apt-get install lxde

both packages brings a lot of dependencies that are not really used in this specific case, but I hadn’t time for polishment. My image now, after a package’s cache cleaning, it’s 414MByte.

Now you can start vncserver to have a new display (called :1)

  • vncserver -geometry 480×320

it will create .vnc directory under /root. It also will ask you a password (insert it twice) and for the viewing password answer NO.

NowIt’s time to stop it for few more configuration

  • vncserver -kill :1

and move to the config files

  • cd /root/.vnc
  • vi xstartup

commenting everythings and insert 2 lines:

  • icewm &
  • lxsession

that’s all folks. Now start again vncserver and pressing “home key” come back to Android desktop leaving terminal emulator open in background. Using androidVNC application (it’s on the market) connect to localhost:5901 with the previous selected password. That’s what you will get

Few last improvement, I made 2 alias in /root/.bashrc

  • alias vncstart=’vncserver -geometry 480×320′
  • alias vncstop=’vncserver -kill :1′

And i changed the wallpaper with the Jaunty default

That’s all for today, i need to sleep 😉

Bye!

Posted in Android, Ubuntu | 57 Comments »

Jaunty under Android.

Posted by Paolo Sammicheli on May 3, 2009

About one month ago I bought an HTC Dream aka G1. I started to play with Android and I think it’s pretty cool.

After few hours I had it in my hands I started to look for information about how to hack it, and I found a lot of useful sources. I got Root on it, and then I installed the Jesus Freke’s version of Android. I was also able to install Debian on the Micro SD Card, and it was a lot of fun. Now Jaunty is out, and we have ARM port available, so I was wondering if it’s possible to install Ubuntu under Android like Debian does. With an useful explanation about how to build an ARM image using debootstrap with Debian I started to build mine with Ubuntu repository.

IT WORKS!


Warning: I suggest to try it only if you’re an experienced user with Android Hacking.

What you need:

  • You need a Rooted G1 with a community build of Android.
  • I tested it with JesusFreke’s v1.50 but it should works with any Apps_to_SD version
  • You need an Apps_to_SD version. In other words you need to make an ext2 partition on your Micro SD Card. Further info.

Go on my site and download the two files: http://paolo.sammiche.li/android

unpack the tar.gz on your ext2 partition. If you have a JF or an Haykuro version it should be mounted on /system/sd

Now you will have a /system/sd/ubuntu folder with a Jaunty ARM image. That Ubuntu image is built with ubuntu-minimal package.

Then copy startubuntu script in/system/sd folder. Umount SDCard from computer and move on the phone keyboard.

With terminal emulator type:

  • cd /system/sd
  • su
  • ./startubuntu

Now you will have an Ubuntu Minimal enviroment chrooted under Android’s Linux kernel. You can go ahead installing a full Desktop Enviroment. You can also use abd shell from your computer for a better typing. 😉

Note: probably the image should be polished. Patches are welcome! 🙂

Posted in Android, Ubuntu | 70 Comments »